Hoping that you all had a wonderful Christmas holiday and wishing you all the best for 2013!
From all of us at The Scrappy Tree :)
Happy scrapping! xx
Monday, December 31, 2012
Happy New Year from all of us
Wednesday, December 26, 2012
December Album Pages
Hello, Diana here, I hope you all had a wonderful celebration. Last week I shared the cover of my December Album, today I am back with a few of the finished pages.
The paper bag holds a letter where I explain the reasons I am making the album and some other notes.
The beautiful tree is from the Chicago Museum of Science and Industry, this years theme is Charlie Brown, and I am using this photo for my first page.
I only used part of the page protector.
The Simple Stories album comes with cute sturdy paper dividers, I cut them in half and added a decorated border to make dividers.
I had some 4X6 plastic protectors from 7 Gypsies that are perfect for this kind of project.
I wish you all the a Fantastic New Year celebration :)
Till Next Year
=Di
Wednesday, December 19, 2012
December Album
Hello, Diana here with the cover of my December Album, although there were a lot of pretty kits from different scrappy blogs and companies I decided to make my own, but just to keep me on track I am participating in Studio Calico's 25 Days : A December Daily guide with instructor Maggie Holmes.
The class came with some print outs and a small embellishment kit, the colors are so nice I bought paper in that color combo and gathered my matching supplies.
I have become a big fan of Simple Stories Albums, the inserts and the page protectors (shown in the below pic) are perfect for any project.
For the cover I added three layers of ribbon and a big Maya road snowflake that I misted with Tattered Angels, it also has a small paper doilies, a transparency snowflake also from Maya Road and a flair that was included in the SC mini kit.
I've been finding a lot of cute albums from fellow scrappers who have been also making a Snowflake the main decoration of there cover, I guess Creative Minds Think a Like :)
Just to add an extra description of what my album is about I included the word Christmas on the side of the album.
This is the introduction page, I will not be making a December Daily, just an album about our December.
I'll be back next week with a few of the inside pages.
=Di
Saturday, December 15, 2012
Twilight tag!
Not that it was the intention at the time, but looking at it now this reminds me very much of a teenage vampire movie! Must have been having an angsty moment :-D
The background is fired brick Distress Stain with splats of tarnished brass, stamped with a Tim Holtz heart and caption and edged with mahogany and soot Distress Ink. I overstamped with a Tim Holtz script stamp in picket fence. The tattered floral rose was inked and sprayed in layers, some fired brick Distress and some peach Glimmer Mist, with gold Stickles to embellish.
The heart is outlined in opal Liquid Pearls, and I layered on some black lace at the bottom and in a bow on top to finish.
Definitely must have been feeling a goth mood! :-D
On a lighter crafty note, I also posted today at The Stamp Attic with another Christmas project so please hop over there for a visit if you like the look of this sneak peek :)
Have a wonderful weekend, happy scrapping!Gayle xx
Labels:
distress ink,
distress stains,
gayle,
stamp attic,
stamping,
tim holtz
Saturday, December 8, 2012
Bag and tag
Happy weekend! I have something a bit different to share today; I made this bag and matching tag as a birthday present and I know it's been received now so I can finally share it :)
This was my first attempt at sewing on a zip so hopefully it stays in one piece(!) ;) The flower is made from a long strip of fabric folded lengthways and sewn along one edge, and then the stitches were pulled tight to ruche the fabric; it was then rolled up to make the flower shape.
The tag uses Andy Skinner's Nature set of stamps, and the colours are Distress Inks and Stains in greens, oranges and yellows.I've also posted at The Stamp Attic today - slightly addicted to the snowflake rosette die!
Hope you're having a wonderful weekend, we are going to spend this afternoon putting up our tree :) excited!!
Happy scrapping
Gayle xx
Labels:
bag,
stamp attic,
tag
Friday, November 30, 2012
Thankful for Thanksgiving
Hello TST! Soooo loved the Thanksgiving posts last weekend, hope our US friends had a wonderful time :) I am posting today with an autumnal thankfulness themed tag because even as a Brit, how can you not join in :) I was very lucky to be nominated by my TST companions as a honorary American so I decided I need to indulge my love of pumpkin and make something autumnal to show my gratitude for the honour (honor!)
I had shortened this tag for reasons unknown (suspect I needed the bottom piece for something else!) but I wasn't going to let that stop me ;) I coloured the background with yellows. oranges and red (some of my favourite colours) and stamped the images on top in black Archival and blue and red Distress ink.
The centre flower is a paper Prima flower in its original colours; I felt the blue matched the background colours so used it as a centre piece. I also wanted a caption to bring everything together so I typed one out on my Dymo :)
I've also posted at The Stamp Attic today so I'd love to hear your comments if you have any :) hope you've had a wonderful weekend :) I am off to a Melt Art class tomorrow, hopefully I will come back with some lovely things to share!
Gayle xx
Labels:
gayle,
Prima,
stampers anonymous,
tag,
tim holtz
Wednesday, November 28, 2012
Baby Picture Frame Set
Hello, Diana here with my last nursery related post.
I was planning on buying a seven gypsies printer tray for this project, but I found these two photo frames on sale at Target for a dollar and change each. The size, color and even the two division were perfect.
To continue with the same color combo of my other decorations I used Crates Little Bo Peep papers again.
For the design I layered paper, a doilie and a tag on the top section and I cut a bunch of scallop circles for the below section.
I was still not sure what photos I was going to use with this project, but after finding this quote I knew it would go perfect with the ultrasound image: "For now in Mommy's tummy, Forever in her Heart".
I can't wait to put a photo on the second picture frame. The top section also has layers of paper, a doilie and a little banner.
For the below section I layered border punch papers and a few chipboard embellishments.
As always I hope I was able to bring some inspiration to your day.
Till Next Time.
=Di
Thursday, November 22, 2012
~Give Thanks~
Happy Thanksgiving to our American friends across the blogosphere. Kristin here, blogging today to wish you all a BEAUTIFUL time, spent with family and friends and yes even to you our non-American friends, you deserve a wonderful day as well :). This year I am thankful for possibly more than any year ever before! It's been a tough go so far that is ending with good health, a steady income, the best family a girl could ask for, awesome friends and the most beautiful bundle of joy this Meme has ever seen.
I'm also thankful for the happiness I find in creating art and crafty things, nothing else relaxes me like loosing myself in a project and seeing the end result. I know you all reading this understand that one :) I thought I would share a few things I created for the first Thanksgiving I'm hosting, wish me luck!
~First up, the beautiful bundle of joy, isn't he adorable~
First visit to Pop pop and Meme's house
Place cards
Centerpiece boxes
I started with bare wood and added some metallic paint in dark espresso, then I added some candles and the misc greenery and nuts. These will be the main focal point on the main table.
Supplies I used
Bookcase decoration
Flowers for arrangements
Tables
The main table
Thanks for visiting today,
Wednesday, November 21, 2012
Letter E Wreath
Hello, Diana here with another decoration I made for our nursery. This time I got some inspiration from THIS talented blogger, and from my also talented cousin who made a similar Wreath for her Fall decorations, I was glad to have the option to call her in case I got stuck in the DIY steps.
The materials I used were Fabri-Tac, Ribbon, Wooden letter and Felt flowers.
I divided the back of the wreath in three and once I added the glue to the first part I just started to wrap the ribbon around and around.
I painted the letter in a soft pink color and added a little flower for decoration, the letter is attached to the wreath with a thinner version of the thicker ribbon, both ribbons together ended up looking very nice.
I must have rearranged these flowers a million times, but I finally settle for this look.
The wreath is already hanging on the nurseries closet door, I hope I gave you clear steps and that you can soon make your own version of it.
Till Next Time.
Labels:
baby wreath
Saturday, November 17, 2012
Veterans Day Inspired Album
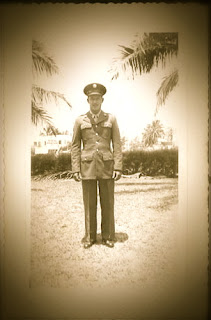
~In Tribute to~ John Alphonse
Langlais
My Father In Law was a good man who
lived a Forrest Gump-esque life. Born in Quebec, he was the son of a single
mother who supported her children by working in the orphanages her children
lived in. His family immigrated to the East coast of Maine when he was a youth,
where he learned to love seafood. He was an amateur Hockey player, an Enforcer
in fact, yet an all around tender and funny guy who made everyone he met, laugh
and smile. He served in not one but two branches of the Armed Forces, the Army
and later the Marines becoming an American Citizen while serving. He was
in both World War II and the Korean war. Having traveled around the world, he
had many stories. Being stranded in France during World War II was a popular
one. He was lucky enough to fall back on his French and communicate with a
family willing to hide him until he was picked up by his Unit. Later in life he
settled on the West coast, near the orange groves in Orange, CA, where he
helped raise two amazing children. Through his life, he was lucky enough to be
married to two different extraordinary women. Even later in life, he was simply
Grandpa, who spoke French with a Maniac accent, pulled funny faces and told
funny stories. His life may seem to be made up of lots of "Two's" but
he was "One of a Kind". He is no longer with us but will live on in
our memories forever.
When he passed, we were given
priceless pictures from his time in the military and I knew the second I saw
them I wanted to create something for my husband to hold some of these
treasured moments.
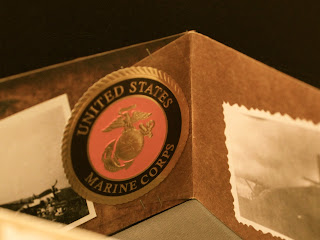
I started with Kraft colored glassine envelopes by Advantus -
designed by Tim Holtz , under the Idea-ology Collection. I loved the look
of these, they already reminded me of the military and they had ready made
pockets for special treasures.
In the US, they can be found here; http://store.scrapbook.com/products/
In the UK, check with http://www.theartisticstamper.com/
OR http://www.thestampattic.co.uk/
The
next step was cutting mat board pages and covers to match the size of
the envelopes. I distressed them with several colors of Distress stains, by
Ranger Ink-also designed by Tim Holtz and found some grunge style pattern
papers to line the covers and pages. Most of the paper I used was Tim Holtz or
7 Gypsies.
In the US, you can find Distress
Stains and other Ranger products here; http://store.scrapbook.com/cat-brand/paint-ranger+ink.html
You can see in the above
picture, where the envelopes met the mat board. I glued the envelopes to the
mat board pages, added a few staples for looks only and then added some
pictures on top of the envelope flap to utilize the whole page. The envelopes then
created a tri-fold effect and were able to be used as pockets for mementos I
did not want to glue or get lost.
You can see in the lower right picture above, I added a faux dog
tag and a few other vintage inspired charms, put them on a chain and wound them
in the books center.
My Favorite page of the album, he is
the one in the middle, looking straight into the camera as all the others
around him carry on. I'm not sure to be honest if this was his going away
picture as he hoped on a train to go to boot camp, but it sure looks like it
could be. Regardless, my all time favorite picture ever.
Being an airplane mechanic, most of
the pictures were of planes, John working on planes, John in planes, so I
pulled out all the random vintage things that had to do with flight and
planes. These vintage travel stickers worked great.
A few pictures of the rest of
the book. My husband now keeps this next to his flag from the memorial and
every so often opens it up to take a peak. As we discover more of his time
spent in the military, we are able to use the blank pages I included to record
some of his moments and memories.
Thanks for stopping by today and
a special shout out and Thank You to those who have served and are serving in Militaries Around the World, keeping their countries safe. Bless you.
To read more about Veterans Day
visit; http://www1.va.gov/opa/vetsday/vetdayhistory.asp
Subscribe to:
Comments (Atom)


.JPG)


