Wednesday, November 9, 2011

Christmas Planner

Hello, Diana here. Christmas is a very busy season for a lot of us, so how about making a Planner to keep you organized; this is the one I made.


I used this Mixed Media Album from Basically Bare; it has four envelopes and a chipboard separator in the middle.


The paper line is from Fancy Pants Tradition collection, alphas are from KI Memories and Making Memories Glitter Stickers, the embellishments I used to make the star is Pink Paislee house of three Flair and a vintage button from my stash.


Because the album has envelopes my planner can be used year after year, I just need to tuck in the specific list and toss it away once the holiday is over.


If you need help figuring out what to put in your book, just Google Holiday or Christmas planner and you’ll find a few sites that offer ideas, some even have downloadable PDF lists.


This is the chipboard separator; I made a 5th envelope with the pattern paper to add an extra list.


The last two envelopes have the fold facing inside so you can appreciate a little better the shape; I also decorated the backs but did not embellish them.


As extra embellishments I used alpha stickers from October Afternoon, twine and assorted brads, this paper is so pretty that it did not need that many decorations.


This is how the planner looks open.


As always I hope I was able to bring some inspiration to your day.

=Di

Monday, November 7, 2011

A vintage inspired mini album of thanksgiving

Hello everyone!  It's Julie here today with an album of thanksgiving, and I'm not talking about the meal.  This album is made for keeping track of what you are thankful for this time of year.  I'll show you how I made this one that I'm going to sell at a local craft show.

First, I needed paper bags and I chose two plain lunch bag sized paper bags and one pink bag.

Since I decided to work on this while watching football, I had to drag down my whole scraproom and set up shop in the living room.  Sadly, I do not have a tv up in my scraproom.  Now if you'd like to make a paper bag album for yourself, you certainly don't need to have a ton of supplies ready.  I'm just one of those crafters that experiments with all kinds of stuff until I settle on something that works.  A few of my essentials include fabric pieces, bingo cards, sheet music, old notebook paper, Cuttle Bug and Papertrey Ink Dies, as well as Papertrey Ink stamps.


I started by folding the bags in half.  I alternated the openings of the paper bags so all my inserts would be on different sides when it's open.  I appologize for that green loop which appears to be growning out of my album.  I had a crafty bag on the floor and that is the strap!  Sorry!  :)

You will need to sew the bags up the middle with a sewing machine.


For my cover, I measured the paper bag front and cut out a piece of fabric the same size.  I used my sewing machine to stitch around the fabric BEFORE I adehered it to the front.  Once on the front (used Yes Paste), I added various vintage goodies until I got it the way I wanted it to look.


This is my first interior page.  I frayed the edges of the fabric and stitched all little embellies on before I adhered to my album.


My next set of pages used one of my favorite supplies, old papers! 


Above is a different angle of the pages.  I used Papertrey Ink Gratitude Journal stamps for this project.


My next set of pages!  I just loved the doily die from Papertrey Ink and I decided to use it with vintage sheet music.  I also used some 7 Gypsies tape under the die cut.  The little tags with pink satin ribbon were also made using a Papertrey Ink tag die.


When looking for fabric, hit up the thrift stores!  You don't need yards and yards, just a scrap will do nicely on a page!


I also love vintage lace and use it whenever possible.


Here's a pic of the inserts I made using the Papertrey Ink tag die as well as a vintage Bingo card and Vintage postcard.  These items peek out of the paper bag openings.  Perfect for journaling and leaving your thoughts.

My back cover.


I hope you enjoyed looking at this paper bag album and get inspired on making one for yourself!


Friday, November 4, 2011

Bonfire Night and Happy Anniversary

In the UK, the 5th of November is Bonfire Night or Guy Fawkes Night, which means a LOT of fireworks! Either in a public display or in the garden at home, there are usually lots of bonfires, sparklers and big bangs!  Guy Fawkes Night is celebrated every year on this date in memory of the foiled attempt in 1605 on the life of the monarch at that time, King James I.  A man called Guy Fawkes led a plot to blow up the House of Lords with gunpowder to take the lives of the King and the Government, but the plot was discovered and Guy Fawkes was executed.  The survival of the King was celebrated across London with bonfires, and all across the UK to this day, every November 5th is celebrated with bonfires and fireworks.  Sometimes a 'Guy' (a man's shape made up of some old clothes stuffed with paper) is put on the bonfire, after the children take the figure around to collect a penny for the Guy.  I remember as a child that the bonfire at the public display was always enormous, but the fireworks were always my favourite :)

If you'd like to know more about the British traditions behind Guy Fawkes Night you can click here but to celebrate like a true Brit all you really need are some sparklers and fireworks and the will to light them and enjoy them :)

In our house, the 5th of November is also my parents' wedding anniversary; we used to buy fireworks every year to set off in the garden but since we now have five dogs it's not quite as important to us to celebrate at home; there are plenty of local firework displays so hopefully we'll be able to catch one tomorrow night :)

In the meantime, I'd like to share with you my card for my parents; I had a lot of fun with this card and it got a little grungy in the end!  The borders are scraps of BoBunny paper, embossed with swirls and then inked with gold ink and Fired Brick distress ink.  The central image is stamped in black StazOn, with the heart shape cut out and then inked in spiced marmalade and dusty concorde Distress Ink, with the central heart shape outlined with a black Posca pen.

I am actually addicted to small sparkly gems, so of course I had to use some to outline the heart shape, and then added the caption using letter stamps on some leftovers pieces of the BoBunny paper.

Thank you so much for visiting us today!

Happy scrapping!

Gayle xx

Wednesday, November 2, 2011

Making a Card Kit

Hello, Diana here; today I would like to share a bunch of cards I made.

What do you do when you buy a very nice paper collection for a project and when you are done you still have a 3rd part of it left over?  Well, because of situations like this is why I started making cards.

I gathered all the leftover papers and embellishments, in this case it is the My Minds Eye’s Stella& Rose Mabel line, since all the papers have matching colors it makes the job easier and faster.


I also matched ribbon, twine, flowers and other assorted embellishments. And to get even more inspired I took an online class at Big Pictures called Cooking Up Cards and made 9 cards using their recipes.

Here are the cards I made:

So Happy.
 Thank You.
Silly.
 One Special Day.
 Kind.
 Together.
Happy Birthday.
 Thank you.
Thoughtful.


Celebrate.


I still had a few chip shapes to use, so I made these three small cards.


There was even enough paper to make a double page layout.


So next time you have a lot of leftovers from one paper collection, make a Card Kit :)

Hope you all have a great day.

=Di

Monday, October 31, 2011

Halloween Party Giveaway Winners!

Happy Halloween everybody!  We were so glad to have so many people visit us for the blog party on 22nd October :) and now it's Halloween we can announce the four winners!  There were four sets of goodies to win, and our four winners are:-

Magaly Guerrero said...
"It wouldn't be Halloween without' Witches, of course! Can you imagine the dullness? And not cackling. What kind of All Hallow's Eve would it be without cackling? Happy Fanciful All Hallow's Eve!
OCTOBER 22, 2011 5:28 AM

Kelly Jeanette Swift said...
It wouldn't be Halloween without a little fright. It fun to have a good scare.Happy Halloween!
http://kellysalteredart.blogspot.com/2011/10/ghost-adventures-wannabes-halloween.html
OCTOBER 22, 2011 8:25 AM

Maggie said...
It wouldn't be Halloween without my niece giving me all of her Reese's peanut butter cups!
OCTOBER 22, 2011 7:46 PM

Jennifer said...
Wonderful post! I loved it! So creative and sweet! I must say "It wouldn't be Halloween without the Halloweentown movies on the Disney channel!"Happy Halloween!
http://broomsticksandlace.blogspot.com/2011/10/happy-halloween-fanciful-twist.html
OCTOBER 23, 2011 8:38 PM

Congratulations winners and thank you everybody for sharing your Halloween must-have's with us - we really enjoyed reading them all and visiting your blogs too!

Winners please e-mail your contact details to thescrappytree(at)hotmail(dot)com and we'll send your treats out very soon.

Happy Halloween everybody!

The Scrappy Tree girls xx

Sunday, October 30, 2011

Happy Halloween Party! PART II

Happy Halloween Everybody !

Thanks for stopping by today. We hope you all are having a Safe and Happy Halloween. First things first, don't forget to come back later today to see our Halloween Party blog winners! 4 lucky comments will be chosen to receive our blog candy from the Halloween Party blog hop we took part in last weekend.

Now, welcome to part II of my Halloween Party prep and projects

This year we are taking a break from the Big party, so I chose a few smaller projects to decorate the house . Michaels had these fun mini grave stones and of course what is a spooky Halloween scene without some spiderwebs, coffins and burlap.


My major projects for this year were the two pumpkins (orange and black) made from one fake carvable pumpkin I cut in half and sprayed with glitter.  Last week I showed you the black one, this week, the star is the Orange one, top right. Complete with an Evil looking tree, a witch flying over the moon and some spooky jack-o-laterns next to a gravestone. All the items are added by being glued to black painted kebob sticks, that I then stuck into the pumpkins soft surface. In the bottom right picture, you can see some of the ATC's I traded with some friends for Fall/Halloween, they are super cute!

Next up is the Happy Halloween banner. I chose Martha Stewart papers, black, ivory and natural burlap as the bases and some misc. embellishments. Again Michaels had these cool skeletons on twine that I just stretched out, added a quick twine extension to and used as my banner base. They also had some awesome looking fake barbwire, that lines the front of the banner. All or most are hot-glued in place. The letters are just inked with 3-4 distrress ink Halloween colors.


Below: Some of my favors and treats this year for the neighborhood kids that alwasys stop by. When we have a party these work for party displays or as favors. All of the pine wood and bolsa wood boxes and such Michaels craft stores offer every year are very economical and make great ways to be creative. They also make awesome and cheap ways for the kids to create some Halloween magic of their own. These lovely trinkets are for all ages, all you need is a little seasonal candy and some craft paint to dress them up!


My favortie thing to make for a large party is a Homemade brew of some kind. Enoy this Home-made apple cider that warms the heart and is always a hit!


Ingredients

o 8 -10 apples ( I used gala for a less tart or intense taste)

o 1/2-1 cup sugar

o 4 tablespoons cinnamon ( or 4 cinnamon sticks)

o 4 tablespoons allspice


Directions

1. Quarter your apples (no need to remove peel or seeds).

2. In a large stock pot add your apples and fill with water--just enough to cover the apples.

3. Add your sugar.

4. Wrap your cinnamon and allspice in a doubled up cheese cloth and tie, and add this to the apples and water.

5. Boil on high for one hour (uncovered) checking on it frequently.

6. Turn down heat and let simmer for two hours (covered).

7. Take off the heat after two hours of simmering and let cool.

8. Remove spices and mash up the apples to a pulp like consistency (a potato masher works well for this).

9. Once cool pour into a strainer over a large bowl. When most of the juice has drained away, put the remainder of the pulp into a doubled up cheese cloth and squeeze over the bowl until no more juice comes out.

10. (At this point you can either restrain the juice to get out the little bits of pulp that remain with a cheese cloth draped inside the strainer to catch them or just leave it like I do).

11. You can store in an air tight container in your refrigerator for up to a week or you can freeze it for later use if you like.

12. Reheat in the microwave or on the stove and enjoy either plain or you can add caramel syrup or caramels, whipped topping with cinnamon or, like my neighbors did if you like it really sweet, with marshmallows or marshmallow creme.

13. also you could make this a diabetic recipe by omitting the sugar and adding diabetic sweeteners to taste in place of the sugar or none at


A few other favorites are roasting pumpkin seeds and making popcorn balls, my Mom made both every Halloween! See the links below for some simple receipes.


How to make Popcorn Balls-


How to roast Pumpkin seeds-


Lastly, my favorite kids game for every Halloween. Even if we don't have a party we set this up so the local neighborhood kids can come and partake. It's amazing how many come back year after year! Google Halloween mad scientist or Hallween body parts game for complete details. See mine below!


The way it works is, you need as many covered boxes as you will have body parts (I found these work best) Decorate/wrap the boxes, leaving a hole in the top of the box, that can be punched out or cut open slightly (see samples above). The trick is a DARK, spooky room and a good hostess, willing to play into the game. I use my hottub covered in white butcher paper with body parts hanging from the ceiling, squishy eyes and fingers on the table and a witches cauldron with dry ice, lite slightly for the center piece. Lay your boxes on a table, high enough that doesn't allow them to see into them(the dark helps with this), but low enough they can reach into it and feel around. Each fake body part that resembles a real body part goes in a box. We have the hostess read the poem on the boxes and only take one child at a time to each box. A flashlight is also a fun spooky accessory, either the hostess or the kids can use. You can get really creative with this one and if you do it year after year you have to because the kids catch on after awhile.
Some my favorties to use are:

Cooked  spaghetti noodles oiled slightly for- the worms
Corn husk for: the hair
End of a pickle spear for: the nose
Hot dogs with almond slivers for: the fingers
Jello  mold for: the heart
Frozen peeled grapes for: the eyes
uncooked popcorn for : the teeth
You get the idea...

Think textures and try them yourself. Have Fun!


Here is a link to some good text and food ideas; http://www.suite101.com/article.cfm/food_crafts/80790


Well that's about it for my Halloween Party this year, hope you enjoy yours!


Again...Happy Halloween!

Thanks for visiting and 
Don't forget to stop by later to see the 4 lucky winners!


Cheers,

Kristinxx
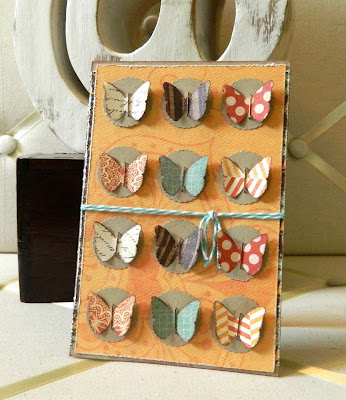
Pumpkin carving fun!

This year, as we have no kids to trick or treat with, we decided to have a pumpkin carving party on the weekend before Halloween for all the big kids instead :)

We made little pumpkin carving kits, with tools and sustenance for the hard times ahead...

...and we made sure we had plenty of worm pie  and other goodies to keep us going too (thanks K for introducing my Mum to this LOL)
We put  Harry Potter on and then we got cracking!  We had some carving templates from Asda but Disney also very kindly sent me a Halloween message with some Disney templates in so you'll spot a few of those too!

Of course some people also liked to make their own patterns too :)

We had a a great time, we definitely need to meet up to do this again next year; so much fun to all join in together!

Happy Halloween!

Gayle xx